Showing posts with label beach. Show all posts

Wednesday, November 30, 2022

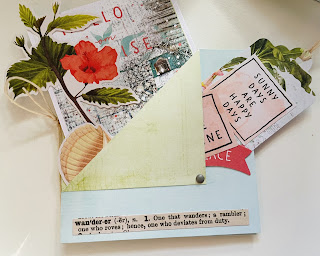
3 mini swap pockets - simple stories vintage coastal


These super cute mini pockets were put together for a swap..

 I used the Simple Stories - Vintage Coastal collection. 

Although there were specs for the pockets, I added plenty of little cluster and elements to make these as much "my style" as I could.. 

I believe in creating something good enough that I would want to receive too. 
Quite often for simple swaps like this, I add extra goodies as gifts to surprise my swap partner.. Things like acetate sheets layovers / bling / lollies / colour cuts packets / washi tape / dies / stencils.. 


Let me know what you think! 
Thanks for your time, Happy Scrapping.. 


Sunday, July 31, 2022

Chase your dreams - boy themed Cog layout

 Chase your dreams - "The Haven" beach

Today I'm sharing another WINNER from the local show (2nd place actually, I captured 1st & 2nd in this category) 

Another layout that I'm trying to catch up on, using a Kaisercraft collection.. I fussy cut plenty of cogs which were layered on top of some large pattern paper pieces on the background.. 


Let me know what you think! 
Thanks for your time, Happy Scrapping.. 

Thursday, July 14, 2022

Meet me in Paradise

 Meet me in Paradise


Today I'm sharing another layout created as a submission to an online challenge group. 
The criteria was to follow a sketch and use four 6x6 papers for the base design. 

The sketch had three photos (one centre and two on the corners) but I chose to only use the middle photo and use journal tags for the outside mats instead. 

This collection seems to be never ending.. I still have LOADS of leftovers for more projects in the future.. yay.. 


Let me know what you think! 
Thanks for your time, Happy Scrapping.. 

Saturday, June 18, 2022

Happy - Beach grid layout

And there we go… Another layout finished.
This one us using Seize The Day collection - Uniquely Creative.
I am really impressed by how many projects I’m getting from this collection with still well over 75% of it that I haven’t used yet.
This is an entry into a fb challenge group that required the square pattern background & use of two photos..
I don’t always journal on the front of pages, sometimes I flip it over & write on the back. Just to keep the design aspect all pretty..


This is the perfect opportunity to share why I love to Distress & Ink edges so much.

You can see the huge difference there is with layering effects, dimension & textures when you take that extra l bit of time & effort to ink the edges.
Of course some layouts you may want the softer clean edges, but I like most of my layouts to have this extra element in them..


Let me know what you think! 
Thanks for your time, Happy Scrapping.. 

Tuesday, May 31, 2022

Everything is amazing layout

Using this incredible photo of friend Em rescuing this beautiful Turtle matched with the Prima - Surf Board collection makes this whole layout fun and bright.
Not a typical beach themed page, bur effective and such a joy to put together.


Let me know what you think! 
Thanks for your time, Happy Scrapping.. 

Monday, May 23, 2022

Be wise & free layouts

 Welcome back crafty friends and family.. I just wanted to share a quick layout featuring photos of my beautiful friend and her stunning daughter using the Wise & Free collection from Uniquely Creative.. 

And a second layout below without photos at the moment.. 

Be Wise & Free 


Monday, May 2, 2022

Vacation Time - Let's Get Sketchy DT


VACTION TIME


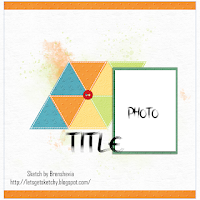
As soon as I saw this sketch, I knew I wanted to do something special with some rub-ons. 
So I grabbed the 49 & Market - Beached collection and went to work.. 
I honestly fell down the rabbit hole with this layout and wanted to keep going and going... lol
The more the eyes wonder over this layout, the more you'll find. 


-- PROGRESS PHOTOS - PUTTING THE LAYOUT TOGETHER -- 

To make sure the triangles are all the same size, I made myself a little template. 
3 1/4" x 4 rectangle piece of scrap. 
3 1/4 - tall
on the top edge, measure in 2" and place a pencil dot (center). 
Then cut from each bottom corner to the center dot on the top edge to create the triangle. 


Mark little dots / lines on the left side of the triangles and then remove. These are simple marker dots so you have a guide on where to place the rub-ons so they look like they are partly behind the pattern paper triangles. 


I really enjoyed the layering of the rub-ons.. However, I did make a little mistake - can you spot it? lol

To make sure I got the triangles laid straight across the layout, I used a T Ruler.. 


 Thanks so much for dropping by! Make sure you head on over to the Let's Get Sketchy challenge blog or facebook page for more inspiration for our amazing DT! 

Let your creativity flow and hope to see your linked up entry soon! 
Toni.. xoxo


Follow more updates on -