Saturday, March 5, 2016

Son-uva Digger layout

Chipboard friends and family, I have a Monster treat for you today with a photo featuring my oldest son Lane with his favourite Monster Jam truck, Son-uva Digger while we were in Brisbane in October.  Lane was stoked that he got to met Adam Anderson (the driver) too!!! Woot Woot!
 

Son-uva Digger


 This base page started out being a basic white Bo-Bunny pattern paper with cogs on it.
I used some Memory Maze goodies with some mixed media supplies to try and make the photo pop!
 I started out by using a chicken wire stamp, place randomly around the edges of the paper. I used a purple StazOn for this.


Then that was followed by cutting the chicken wire into 3 strips and separating the cogs into smaller pieces of clusters.. Then sticking down the chipboard and coating with some white Gesso.
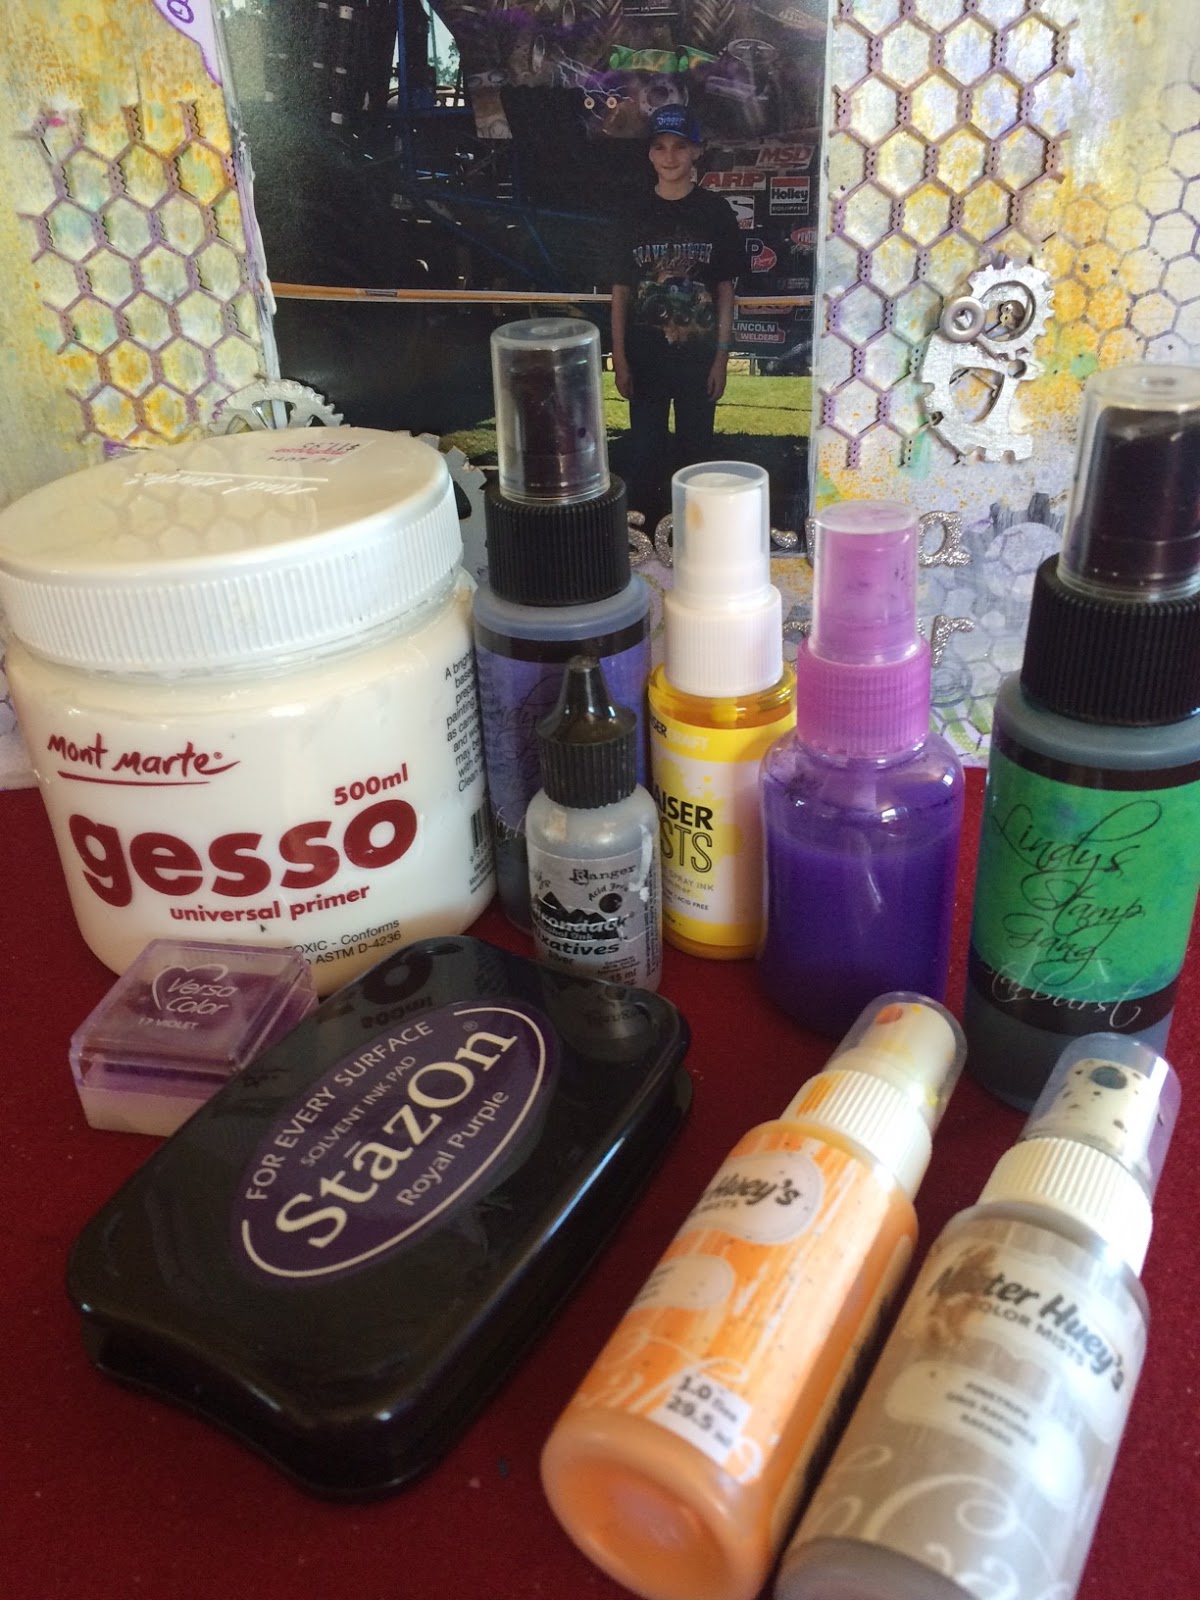
Once it was dry (via the heat gun - thanks to my impatience) I sprayed with A LOT of different mists. *see photo below*
Allowed to dry again before I painted the Silver ink over the top of the Cogs and lightly ran the lighter purple ink pad over the top of the chipboard wire.
 The metal embellishments were put on, along with the Thickers title and journaling tag added.
The final touch was a light spray of a brown over a Memory Maze stencil to mimic some mud splashes in the top corners.

 
Mixed Media supplies used 
 
 
Design Team 2015 July to December
 
Memory Maze products used:



Thursday, March 3, 2016

ArchiScraps March challenge

Welcome back... I'm back with some exciting news from my entry just a few days ago into the ArchiScraps Febuary challenge ---- I WON!  

I was truly shocked and speechless! I certainly wasn't thinking that I would even be in the running to be a winner as I was really only new to the blog and first time entrant with a quick layout.. Although I am very grateful as I did put alot of thought into the details of the layout and tying the building in as much as I could.. I was stoked with the finished layout, so am very happy others liked it too!! 

Anyway, this evening I'm here to share with you this months challenge... It is to use this stunningly beautiful building as inspiration and it requires the use of Gesso / Texture Paste.. 


The my first instint reaction to the inspiration pic was WOW BEAUTIFUL! 
So just knew I had to use a photo that would capture that same reaction and of course title it the same.. I actually Googled for quite a while trying to find some more info on this building, but couldn't find anything!  ** So ArchiScraps DT - if you have info on this building, can you let me know please, I'm intrigued.. :)

Beautiful


The photo is of a friend and her goregous little boy as a baby, about 18months ago.. 

As per my normal crafting process, I tosed around so many ideas and options that just weren't working... Finally a bright spark came to use a canvas and my favourite new Yellow spray mist.. :) 
 

Next was trying to find a stencil that matched the decorative designs on the buliding.. The designs are so beautiful and delicate.. Of course I had plenty of goregous options, however NONE of them were going to work because I really needed a negative of the stencil... Ahhhhh.... First world problems of a crafter!  Anyway, I setteld on this design as it replicates the design under the curve of the building awning thinyg.. Unfortunately the stencil is still the wrong way away though..  Is used a white modelling paste.. 


Even though my process ws tiring at times, I really enjoyed making this project when things were going right! lol.. 😉. 
One such thing came after a few more fails... I lightly coated the top of the modeling paste with gesso and sprinkled with white puff embossing powder.. I loved how the modelling paste actually puffed up.. I know usually we try to not overheat the paste so it doesn't do this, but with this project it added extra texture and is keeping it's puff so well!! Yay!  More texture and dimension the better I believe! lol.. 


 To embellish the canvas I used two different Memory Maze chipboard flourish swirls.. I first coated with gesso then covered with white paint.. I did the same to the two MM pieces that look like dots.. I then put on seperate pearl dots on them to add even more texture, dimension and give an elegance feel.. 


Both the MM pirate ship piece and title piece are simply painted with a grey paint.. The ship has some Glitter sprinkled on it too.. 
Lastly was to add the white flowers and white butterflies.. 


I would love for you to drop by the ArchiScraps challenge blog this month and link up your own creation inspired by this stunning building! Memory Maze are sponsoring with a great chipboard pack!! So get crafty and link up!! Have fun, Toni.. xoxo

Memory Maze products used:
 
beautiful memories 110 x 180mm min buy 3
 
Swirl 1 Swirl flourish  min buy 3
 
Swirl 6a  flourish  min buy 3
 
Fireworks dots

Tuesday, March 1, 2016

Fairy Garden February

Update - Here are the newest photos from our Fairy Garden project...
These photos were captured on the weekend just past.. Hunter wanted very much to go out and play, but it was very hot in the direct sunlight, so we decided after only about 2min that we would come back out in the evening with there was shade, so I do apologies for some photos being half dark..


We put in some small square pavers so Hunter can now walk around his large fairy pot and play without stirring up all the sand.. lol..


We built some little yards for the mini fairy houses..


As you can see, we managed to get the entire garden top covered with sand... Much better now when we get some rain!


Hunter got to make up his very own fairy garden pot.. It's actually quite large!

Hunter playing with the Fairies and Dinosaurs..
There was a whole story that went along with this.. lol..


Apparently even the small dinosaurs need some shade and a house to escape the weather!


Monday, February 29, 2016

Archi-Scraps February challenge

Good afternoon crafters.. :)
I am back today with a fun layout supporting a blog that is only fairly new to me, but have had a good look through and believe that I will be back as often as I can to join in their challenges..
Being a Memory Maze DT member we were informed that MM will be sponsoring the Archi-Scraps challenges soon and so I thought I'd check it out.. While I was there I feel in love with an idea for their current challenge.. Unfortunately it closes today, however I'd still love you to drop by their blog and maybe keep an eye out for upcoming challenge themes..

Anyway, this month they posted this stunning photo of the Sydney Post Office (which is Heritage listed), for the inspiration and have asked for crafters to use a CLOCK on their creation piece..


Slow down the clock


Here is the layout that I have created using the structural design of the building as my main inspiration..
On the building there are 3 main levels, therefore there are three rows of the squares.. These squares also represent all the windows..
Next are the two squares that are corrugated, the add the texture to the page and the texture from the building also..
As you can see I have used a Memory Maze chipboard piece for the required Clock feature.. I have coloured it with embossing powder to match the blue that the clock is in the photo..
 
Finally, my last bit of trying to tie this layout to that inspirational building was my journaling -
Hunter, my darling little man. How quickly the clock ticks when everyday is filled with your fun, crazy and boisterous nature. You're a genuine character! You have style that never goes out of fashion with your love of being included in everything! Here you are after completing your first ever 1km Beach race. You did great for a 5yr old. 6:31:00. You want to grow up so fast, buy I'm trying to slow the clock down!

*quickly the clock ticks - refers to the long time that the building has been around.
*genuine character - refers to the memories this building shares with Sydney.
*style that never goes out of fashion - well, no words needed. Look how beautiful the building is!!

*grow up so fast, slow the clock down - refers to the buildings around this one and it's heritage listing.

 
Righto, well that's it for me today.. I hope you enjoyed my fun layout.. I really enjoyed making this one! Would love for you to drop by the Memory Maze blog or the Archi-Scraps blog sometime soon to see what we are sponsoring! Until next time, happy scrapping.. Toni.. xoxo

Monday, February 22, 2016

Hey Good Lookin' Canvas - by Toni Herron

Hey good lookin'... DT Toni here to bring you a fun boys canvas featuring plenty of Memory Maze chipboard and products from a MM stockist (D'Lish Scraps)  monthly kit..
 

Just Be You


First of all, like normal I start out by placing down some of the products in places that I think I will stick them down.. This gives me plenty of time to figure out exactly where I think something will work great of not or what will go with what.. It also helps with the selection of colours for the chipboard pieces also..
 
To prepare the base of the canvas I simply painted it over with some White Gesso..
I knew that I really wanted the focus of the canvas to be on the beautiful cheeky photo.. So I used the colour of his shirt to stamp randomly to assist with highlighting it.. There are also some Clear Impasto on there using a splash dots style Memory Maze stencil mask..
 
For the chipboard I used some very basic techniques to colour them. Using just black paint, Grey paint (barb wire has been sprinkled with distress glitter) and inked.. However notice the COGS! That is actually ONE CHIPBOARD PIECE, SPLIT IN TWO! I love this technique as it gives me the same design for the price of one! Woo Hoo!
 
When the chippies were drying I took the opportunity to get a start on the canvas layout..
First was the black wire mesh design, the photo, the flags and frames with the barbwire slipped underneath once it dried.. Some cute flair buttons and bowtie from the kit to finish off this cluster..
 
There are these cool bricks placed around the canvas. There is a method to this random madness though! There are sets - 1, 2, 3, 4 & 5 pieces to each grouping..
 
Here is a close up of that split Cogs set that I mentioned before! Did you know that since Memory Maze chipboard is so thick, it can actually be split into three!! I only needed for this project..
 
Memory Maze products used;
 
Brick Wall
 
ATC  locks and frame
 
be true to yourself 200 x 200  priced each  min buy 3.
 
ATC frame 6 hole with micro elements and stand
 
Barbed Wire 3 strips = 90 cm


Thank you for joining me today
Toni Herron
2016 Memory Maze DT member


Thursday, February 18, 2016

Scrapbook Fantasies - week 4

 
Welcome back...
First I have some fantastic news to share about Lane's sports!!!
JUST TODAY - he has been chosen to represent the local district for AFL again, in an age group up! and also got word from the regional Cap office to say he has been selected to rep at State level for Swimming! YAY!! That means it will be 3 trips to Chandler (in Brisbane - 18 hour round car trip) out of 4 months..
 
Anyway, this post is not to focus on Lane but is actually featuring an AWESOME effort by my special little man Hunter.. This pocket layout was done with the inspiration from the Scrapbook Fantasies weekly challenge - #4   LIVE LAUGH LOVE


This was his VERY FIRST time running a 1km race! He sees his Dad and Lane run the 5km all the time and so desperately wants to join in! So this Australia Day he ran the shorter 1km distance in only 6:31:00 min.. Not too bad for a 5yr old who had sore feet cause he had cut them a little on the rocks at the turn around point on the beach.. 


You can see that I followed the inspiration by making the title of this pocket page Live Laugh Love..
Hunter very much enjoys looking through the scrap pages of himself, but it's getting difficult with the big heavy albums, so I am finding myself doing a few of these pocket pages for him every now and again so they can simply be placed into a 3 ringed binder for super easy storage and accessibility for him! 


Here are some more cute photos of Hunter during & after his run.. :)
 
 
 Getting a high five from one of the people who run the Cap Coast Running Club..


Thank you for dropping by today! I hope you may find some inspiration to drop by the Scrapbook Fantasies blog or store and join in the weekly challenges yourself!
Until next time, happy scrapping.. Toni.. xoxo

Monday, February 15, 2016

Envelope Challenge card - February

Again this month I have been very honoured to join in the Envelope challenge from a great bunch of ladies in an USA crafting group..
 
Here is what was sent to me..
White cardstock for the card base
Purple precut cardstock
paper doiley
adorable Easter bunny stamped image
 
 
I'm not always that into colouring and certainly wasn't that keen when I was putting this one together, so decided to leave it uncoloured for the recipient to colour themselves.. :)
 
The only rules are you must use part of everything in the envelope and can only add a max of 5 things..
The things I added where -
1. Green striped pattern paper
2. Easter & Eggsceptional were actually cut from the same piece of pattern paper
3. White mesh ribbon
4. pearl strips
 
It was definitely some fun making this card!! Thanks again to Brenda for sending it over to me and including me in this months challenge.. :)