Feels like I am forever catching up on swap cards that I made last year... ehh..
So anyway, here are some more..


Feels like I am forever catching up on swap cards that I made last year... ehh..
So anyway, here are some more..
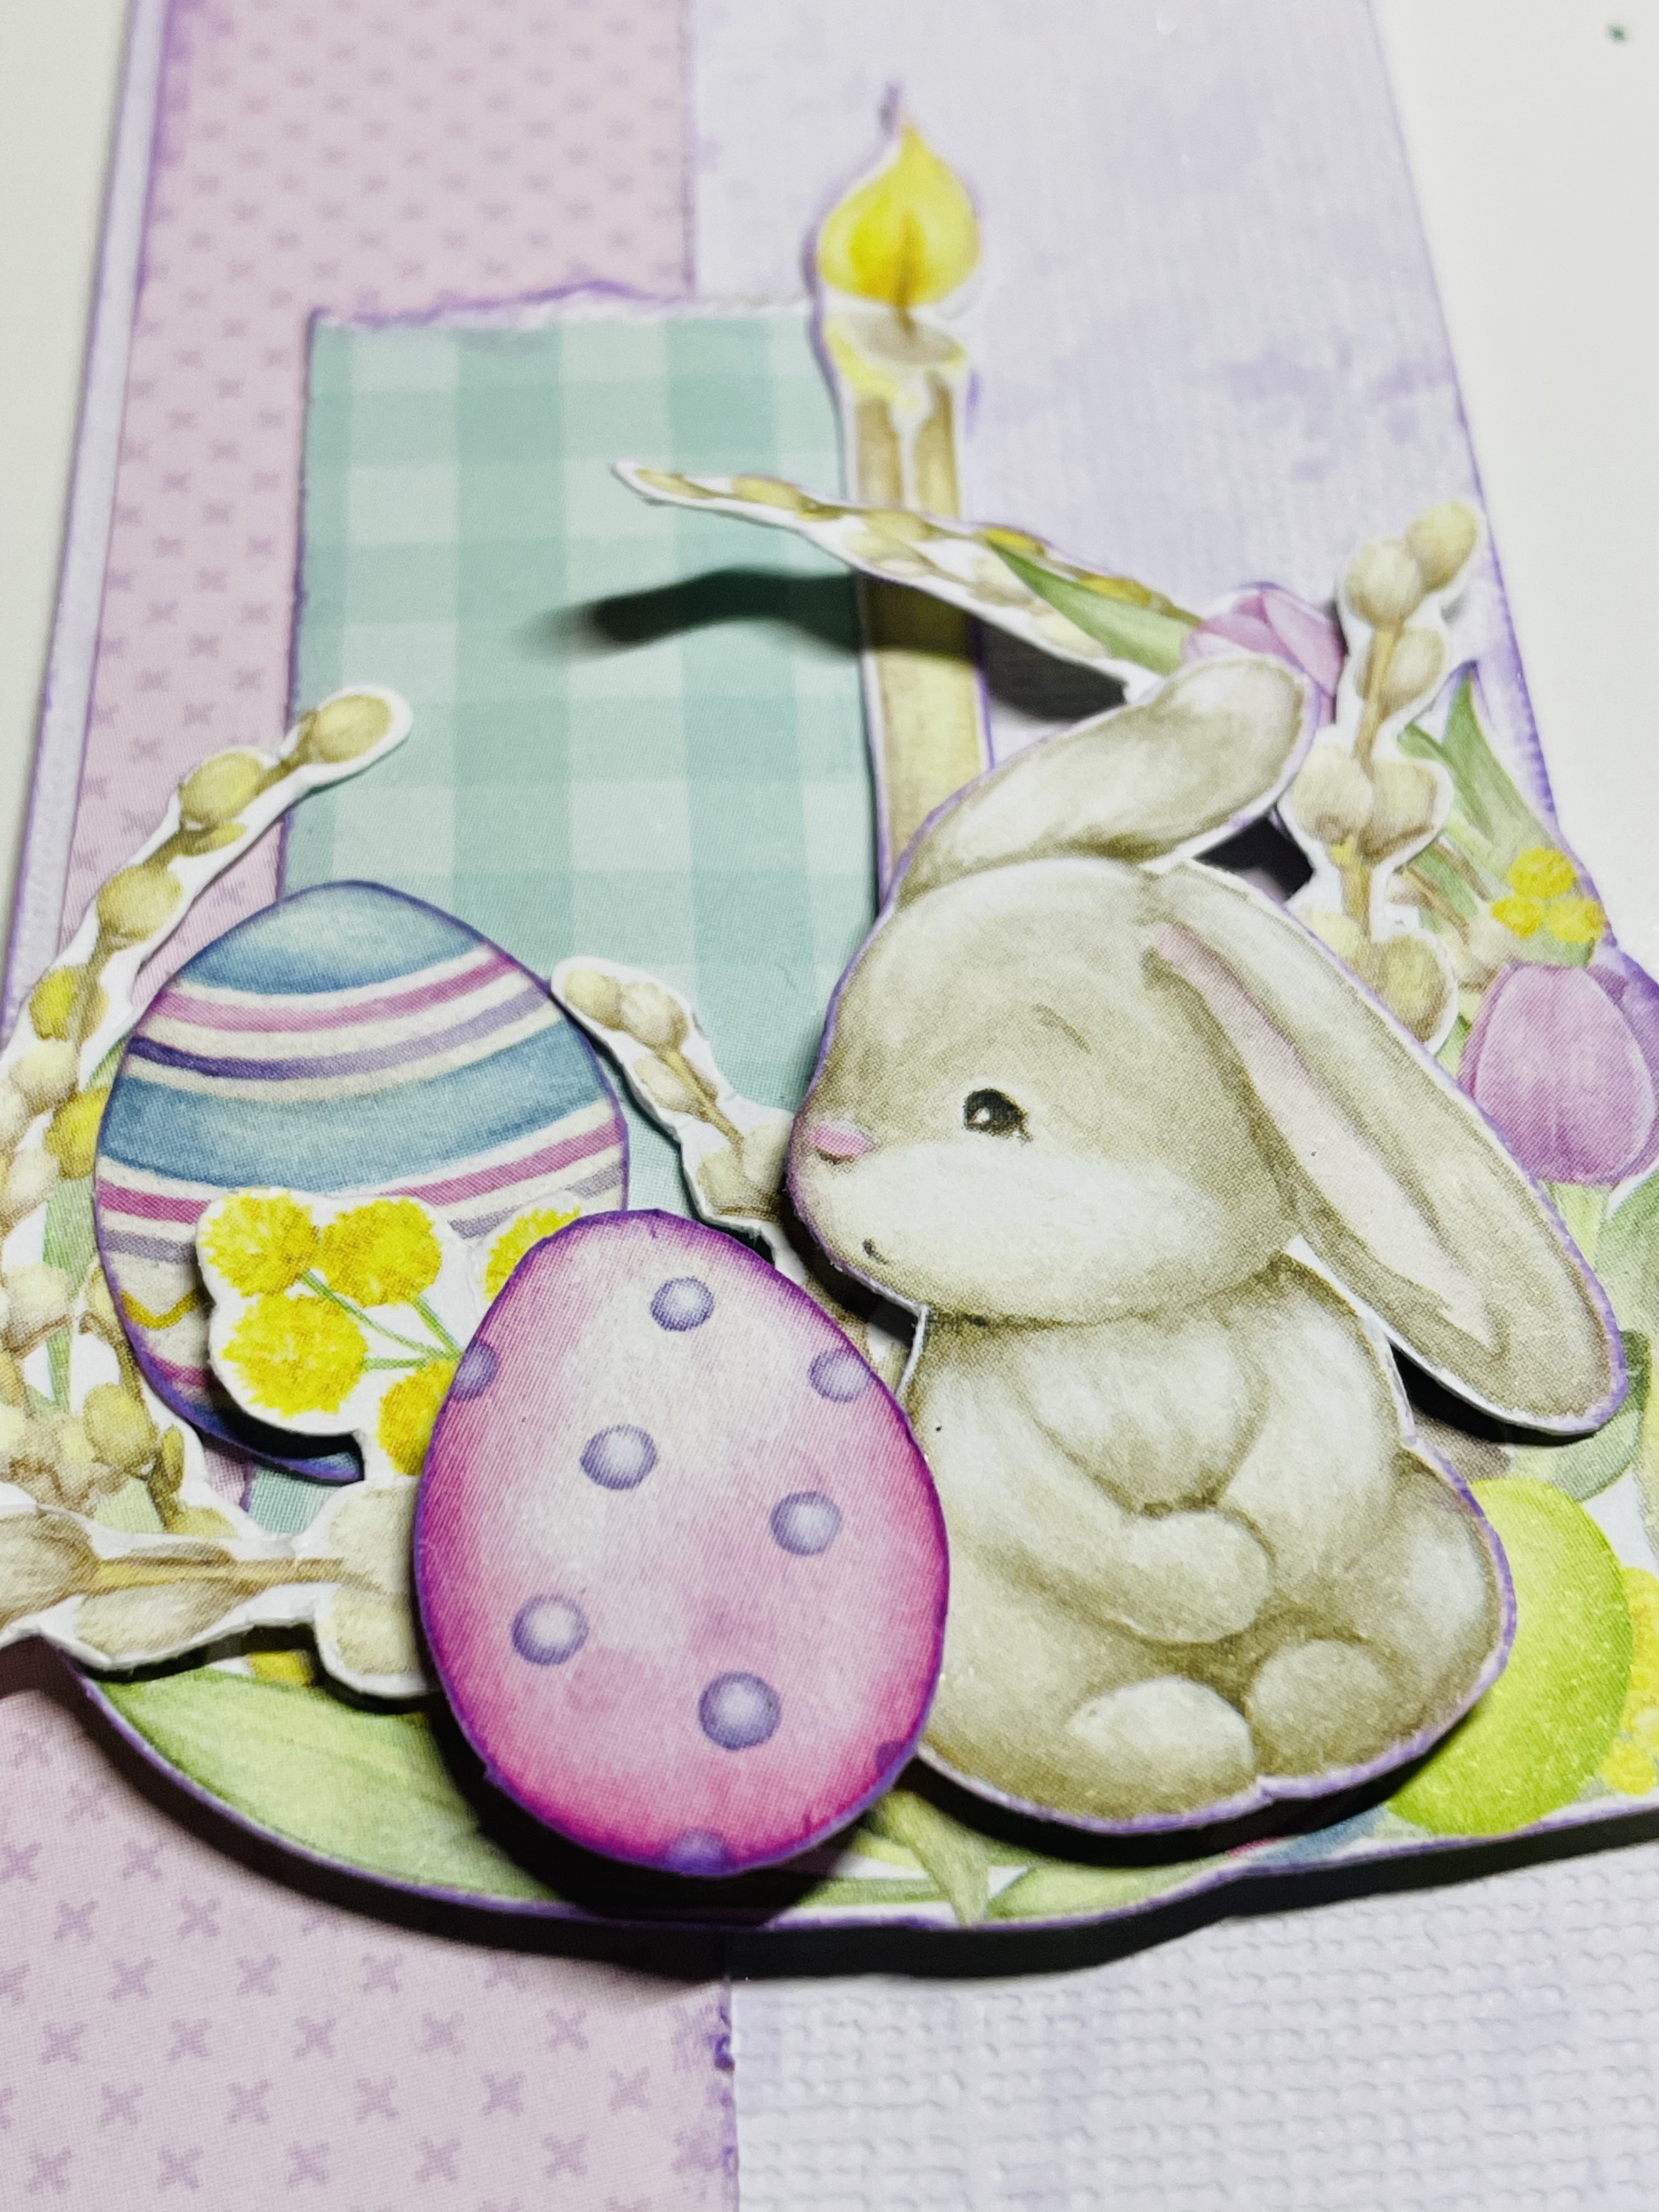
oooo I do love Easter!
It's definitely my favourite holiday of the year. Today I'm sharing a quick progress video of make 3 Easter themed tags / bookmarks.


All are similar with their cluster layers though. It's basic and easy! I love making projects like this, it's relaxing not having to over think every element and the flow keeps going. 😍 I used the sheets from Craft O'Clock that I cut and left my thumb with a numbness.. 😬😢 Anyway, totally worth it and I still have heaps of leftovers to play with for other projects. Would love for you to drop by my crafty fb page for more updates - Scrap Crazy with Toni
Chicks


– made by Toni Herron for Twitchit Craft Kits

3 projects for a "flat happy mail" swap..
So excited to bring these simple projects with you today..
Anyone can follow along from beginners to the more advanced who like to bring it back to basics sometimes..
Visit my on FACEBOOK to keep up to date with my projects in real time
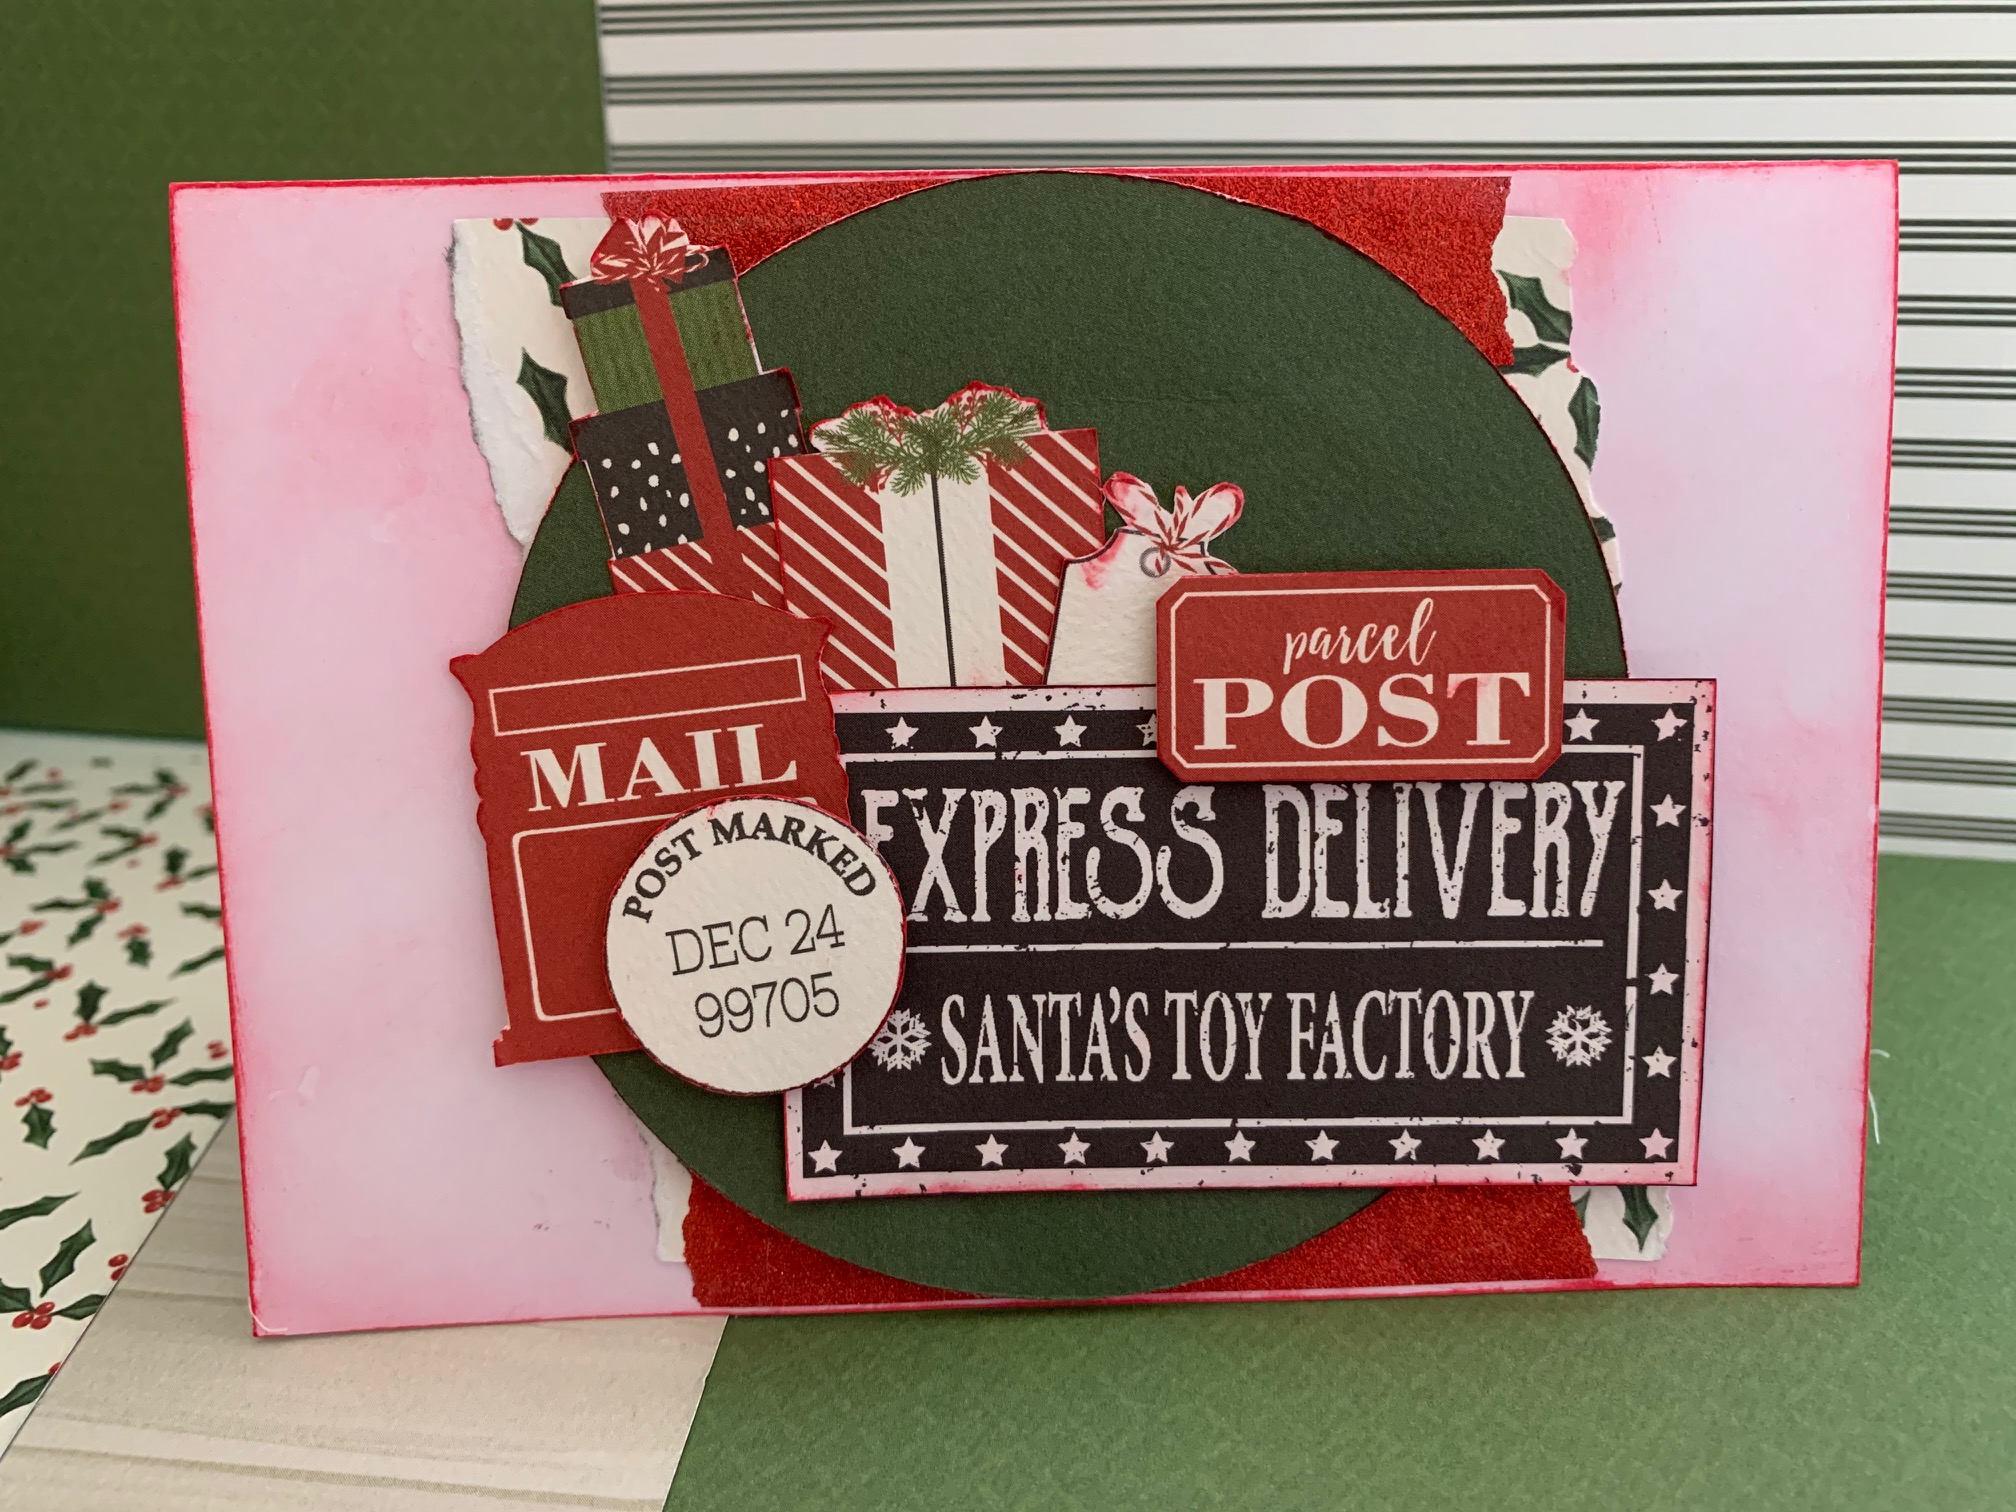
Scraps Cards – made by Toni Herron for Twitchit Craft Kits
Christmas Traditional Kit
These cards are so easy and perfect to use up all the fiddly bits leftover from kits.
Starting off
with plain cardstock to create your usual card base. I used an A4 piece and cut
in half at 5.3/4”. This then folded in half creates the card base at 5.3/4”x4”.
Heavily ink the edges of the card base.
Card topper-
use a larger piece of cardstock from your scraps box. *tip- doesn’t matter what
colour or pattern as it is about to be covered- 5.1/2”x3.3/4”. Stick double sided tape / glue
to fully cover as much as possible. Now using all of your kit scraps, place
each piece randomly to cover the whole topper base. It will look a little like
a mismatch quilt design. Once the whole
base is covered, cut the overhang from the edges. Use some foam tape / 3D dots /
cardboard behind and adhere to the card base. This will give a fun dimensional
element to the card. Place a tag, fussy cut pieces or sentiment to the front of
the card topper to finish off.


Visit my on FACEBOOK to keep up to date with my projects in real time
6 simple and easy Scrapbooking layouts – made by Toni Herron for Twitchit Craft Kits
Christmas Traditional Kit

*tip- Begin by fussy cutting everything out from your bonus mystery sheets. This makes designing and placing your cluster pieces much easier and quicker later on.
Start by cutting a large circle from your base pattern paper using a circle cutter / electric cutting machine / tracing a plate towards the bottom left side– Ornaments approx. 9” diameter. Flip the circle over, the reverse side will be included in the layered design.
Place your pattern circle on top of this, roughly in the middle of the 12” layout so it is off centre to the layers. I have included a 5”x7” photo insert. You are able to use whatever size photo suits your needs.
To make the layout pop, use foam tape / 3D dots to raise your cluster elements. I have used fussy cuts from the bonus sheets, stickers from the sticker sheet and tags. *tip- lay all of your pieces before sticking them down. Take a photo with your phone, then use that as a guide to stick all pieces onto your layout. Creating dimension with foam tape as you go.


Visit my on FACEBOOK to keep up to date with my projects in real time
Box with 3 cards – made by Toni Herron for Twitchit Craft Kits
Christmas Traditional Kit
Bottom box –
DK Green / Woodgrain 8.1/4”x10.1/4”.
Score short side at 1”, 2”, 6.1/4” & 7.1/4”.
Score long side at 1”, 2”, 8.1/4” & 9.1/4.
Fold, cut and stick together to create box shape.


Lid- Plain cardstock
8.3/8”x10.3/8” *tip- for perfect fit
over bottom box, add extra 1/8” to the centre measurements. Score one side at a
time at 1” & 2” then rotate and repeat on all 4 sides. This will automatically give you
the extra 1/8” in the centre. Fold, cut and stick together to create box shape.
Card Topper –
Poinsettias 4.1/4”x8.1/4” + Woodgrain 6”x3.3/4”
+ 2 Red/Green 1”x6.1/4”
Score Poinsettia pattern piece at 1” on the two short ends, this will cover the
top and hang over the box ends to decorate those two sides. Add the two Red
pieces to the long sides of the box. I then added a long sentiment strip from
the sticker sheet and used a circle punch to create two half circles for finger
hole grips, making it easier to slide open the box.
Add some double sided foam tape or chipboard under the Woodgrain pattern piece
and still onto the top. Then I added some Gauze and created an embellishment cluster
with the Ute & Tree from the sticker sheet. Plus a tag and sentiment piece from
the bonus mystery sheets. I inked all edges of the top box.


PROJECT TWO-
Start with 3 plain cardstock at 4”x12”
OR regular A4 cut in half. Now fold each into a card base.


3. Red/Green (cut out a circle) +
Poinsettia off cuts
Using a blending brush, add a distressed ink look to the
base of the card. Then build your topper on to the circle.
Ink around all pieces to be used on card.
Firstly I placed the circle and added the torn pattern pieces behind and added
washi tape to hide any gaps.
Fully adhere all of these before adding fussy cut pieces to create a cluster.
*tip- add foam tape / 3D dots / chipboard to pop the layers.
Visit my on FACEBOOK to keep up to date with my projects in real time
Twinchie card, Tag Holder, Flag Garland – made by Toni Herron for Twitchit Craft Kits
Christmas Traditional Kit
PROJECT ONE –
Twinchie card
Starting with a plain cardstock 6”x12” - Fold this in half to make a 6”x6” card
base.
Distress and Ink around all edges of pieces to be used on this card.
For the first layer of squares, cut all 9 pieces to 1/8” under 2” = 1.7/8”x1.7/8”
(use off cut pieces)
Second layer of squares, cut all 6 to 1/8” under first layer – 1.3/4”x1./34” (use off cut pieces)
Lay them
onto your card to create a topper design. Move and rotate pieces until happy with
how they are laid out. Stick down the first layer then add some foam tape / 3D
dots / cardboard to make the second layer pop to give dimension. Finish off
card with some tags and stickers from the sticker sheet in the kit.


PROJECT TWO –
Flag Garland
Bottom layer RED – 14 Red/Green 1.1/2”x2”
Middle layer GREEN – 14 Red/Green 1.1/4”x1.3/4”
Top layer WHITE WITH STRIPE – 14 Twenty Five Days 1”x1.1/2”
Cut a small 1/2" tail in each flag piece. Do this on ALL layers.
Now stick all layers together making 14 full flag pieces.
Add each letter from the “MERRY
CHRISTMAS” stickers on just a little bit lower from the top edge. This leaves
room to poke some holes into each banner on the top sides and threading twine back
and forth to create a hanging garland.


PROJECT
THREE- Accordion Tag Holder
Accordion -
Festive Florals 6”x10”
Score long side at 2.1/2”, 5” & 7.1/2
Score short side at 4.1/2 – fold this up to make a pocket.
Add a brad
onto the far left and right sides to secure the bottom flap up.
Add some washi tape for decoration.
Fill with tags from Christmas Tags pattern paper and fussy cuts from the bonus
mystery sheets.


Visit my on FACEBOOK to keep up to date with my projects in real time
Chocolate Gift Box – made by Toni Herron for Twitchit Craft Kits
Christmas Traditional Kit
Decorating –
2 Red/Green 2.1/2”x1.1/4” and 1.1/4”x
4.7/8” and 2.1/2”x4.7/8” + 2 Poinsettias 2.1/2”x4.7/8” and 1.1/2”x4.7/8”
+ 2 Twenty Five Days 1.1/4”x4.7/8” and 2.1/2x4.7/8”


Ink all
edges of the project and papers to be used.
Stick down all of the pattern papers.
Add a topper to the front using tags and fussy cuts from the bonus mystery
sheets.
Add a magnet to keep the card flap securely closed to the box.
Finish off the box by adding in a special chocolate. This box fits a Marshmallow
Santa.


Visit my on FACEBOOK to keep up to date with my projects in real time