This was just a fun little project I put together featuring Uniquely Creative - High Tea collection.
The base design is loosely based on an idea from Alicia Redshaw at Scrapbook Fantasies.
However the measurements are mine and some design changes were made to not clash with copyright laws.
High Tea - Happy Mail penpal idea
You are welcome to use this project as an inspiration or scraplift if you’d wish!
This would make sure a great little Happy Mail idea to send to a Penpal. It would hold quite a bit of goodies as it’s 1” wide in the holder / pocket area.
Let me know what you think! Thanks for your time, Happy Scrapping..
Another to share in my Scraplift layout series. This time using an very old collection Peppermint Kisses by Kasiercraft.. It is a Christmas based collection, so it made the trail of presents a fun little element for the scraplift design.
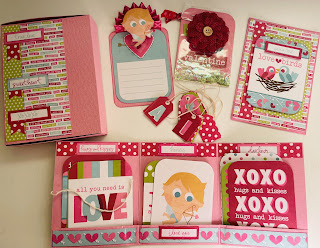
Righto... I've got a couple of cute but VERY SIMPLE Valentines themed projects to share with you all.. These are all for swaps.
Part 1 -
And even thought this “Love Struck” collection is crazy OLD it just kept on giving & giving… I was able to also make a little heart token pocket purse thing. Seriously, so cute!
I dug deep for these super cute photos of Hunter when he was little at a local park enjoying the slide..
I used the Daydream collection from Cocoa Vanilla and an adorable Wolf pup and flag garland diecut from Scrapbook Fantasies.. It's a simple page but the focus highlights are balanced nicely without too much extras being added.. :)
Thanks so much for dropping by! Make sure you head on over to the Lasting Memories layout challenges website for more inspiration for our amazing DT!
Let your creativity flow and hope to see your linked up entry soon! Toni.. xoxo
I was so truly lucky and blessed to be able to attend my son's school Formal last year.. (2020) During all of the restrictions many schools cancelled their events, however his school took a poll from the kids and choose the best option to be able to hold the event would be to have the students and limited teachers only.. Thankfully as the "Parents & Friends" group, we were asked to assist the catering and wait staff for the night.. So myself, my Mother and a handful of other incredibly beautiful Mum's got to be involved..
This layout I wanted to do something a little more special and eye catching.. Using the Celebr8 "star gazer" collection, I made all 9 squares into shakers and then printed out small photos to attach over the top. Starting off the page with a white cardstock base and smooshing with some bronze ink.. Add the embellishments to finish off the page and it is one of my most favourites that I've done recently..
Thanks so much for dropping by! Make sure you head on over to the Lasting Memories layout challenges website for more inspiration for our amazing DT!
Let your creativity flow and hope to see your linked up entry soon! Toni.. xoxo
Twinchie card, Tag Holder, Flag Garland– made by Toni Herron for Twitchit Craft Kits
Christmas Traditional Kit
PROJECT ONE –
Twinchie card
Starting with a plain cardstock 6”x12” - Fold this in half to make a 6”x6” card
base.
Distress and Ink around all edges of pieces to be used on this card.
For the first layer of squares, cut all 9 pieces to 1/8” under 2” = 1.7/8”x1.7/8”
(use off cut pieces)
Second layer of squares, cut all 6 to 1/8” under first layer – 1.3/4”x1./34” (use off cut pieces)
Lay them
onto your card to create a topper design. Move and rotate pieces until happy with
how they are laid out. Stick down the first layer then add some foam tape / 3D
dots / cardboard to make the second layer pop to give dimension. Finish off
card with some tags and stickers from the sticker sheet in the kit.
PROJECT TWO –
Flag Garland
Bottom layer RED – 14 Red/Green 1.1/2”x2”
Middle layer GREEN – 14 Red/Green 1.1/4”x1.3/4”
Top layer WHITE WITH STRIPE – 14 Twenty Five Days 1”x1.1/2”
Cut a small 1/2" tail in each flag piece. Do this on ALL layers.
Now stick all layers together making 14 full flag pieces.
Add each letter from the “MERRY
CHRISTMAS” stickers on just a little bit lower from the top edge. This leaves
room to poke some holes into each banner on the top sides and threading twine back
and forth to create a hanging garland.
PROJECT
THREE- Accordion Tag Holder
Accordion -
Festive Florals 6”x10”
Score long side at 2.1/2”, 5” & 7.1/2
Score short side at 4.1/2 – fold this up to make a pocket.
Add a brad
onto the far left and right sides to secure the bottom flap up.
Add some washi tape for decoration.
Fill with tags from Christmas Tags pattern paper and fussy cuts from the bonus
mystery sheets.