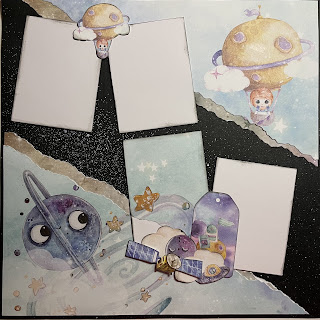
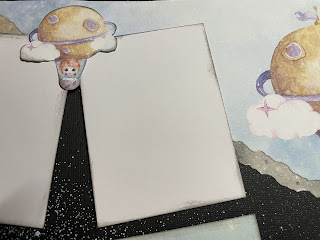
I truly loved putting these together for a recent swap, that I decided to use up some of the scraps leftover from the 8x8 paper pad and make a couple more. These are a little more simple & basic than the swap cards, but I have included the photos so you can be inspired to push it to the next level.
More fun layouts & a teepee card created using the
Cosmic Adventures collection from Craft O'Clock.
I have very much loved creating with the Craft O'Clock collections since I got my first set in October 2020 at a retreat.
I have since started to get my hands on their Creative Young collections as they are released and can tell you, they are right up my alley for style & signature focus.
LAYOUT 1
Kids of all ages can immerse themselves into the characters and story of the images.
Using an untapped imagination, these products bring a new ideal world for the kids in our hobby!
Either create a layout yourself or watch along as your child creates some magic themselves.
LAYOUT 2
LAYOUT 3
TEE PEE card
Special Sneak Peek of the layout Hunter & I scraplifted together.
and don't forget to check out the Scraplift layouts that Hunter & I did also, I shared that post the other day - Kids Creative session 9.
Hunter & I made a quick video showing how to "scraplift" another layout.
We used a 6x6 paper pad from Craft O'Clock Creative Young range - Cosmic Adventures.
We had so much fun putting this together, although both of us are still getting over being sick, teenager who doesn’t know how to play the PS4 quietly, water bottle issues & I may have ran over his little toe.. oops, sorry Hunter.. :(
Welcome back crafty kids,
we are excited to bring you another Creative Club session.
We are actually up to # 9...... Although we miscounted in the video.
Today though Hunter & Toni share with you a special Scrapbooking layout put together using a 6x6 paper pad from Craft O'Clock - Cosmic Adventures.
Cutting up 4/5 sheets of the 6x6 papers into different sizes and then layer clustering in the corners behind a photo mat.
Cut out the embellishment images and add more layers with foam tape.
Hunter's layout
My layout
***we do apologise for the recording being of a night time with some not so great lights.
Thanks for joining us, hope you enjoyed the video. See you all again soon.. Hunter & Toni.. xoxo
Let me know what you think! Thanks for your time, Happy Scrapping..
More fun with the May Gibbs designs from Paper Rose.
This time there 3 simple designed layouts using the Christmas collection.
LAYOUT 1
LAYOUT 2
LAYOUT 3
I've started this third layout, but struck a small problem.
I had an idea in my head. I have done that idea. But now unsure on what my next step with be to finish the layout off...
Or I could just do something very me with my new assessment of how scrapping brings joy for me, and simply be ok with it being done cause I've already successfully achieved what I had imaged anyway...
Alright.. Here we are........
One of my fav interactive layouts I've done.
I had added some twine & mesh ribbon, but other than that I have stuck to only the paper & stickers than came in the Graphic 45 12x12 collection kit.
I have had this collection for a while (since it was first released).... I forgot about it until I had my big paper tidy up last week. 😆
This video shows the measurements, paper choices & assembly of the interactive base.
Off camera I added the embellishments & clusters. But stick around, as there is a completed share & show video at the end and some photos to finish it all off.
Feel free to mute me & fast forward if you want.. lol.
Measurements:
A- 12x12 (this is your base)
B- 12x10 score at 1" for flap - 11x10
C- c + c1 9x6 ... i 3x12
D- d + d1 8 1/2 x 4 1/2
E- 9x9
F- f 8x5 ..... 2x sliders for e pockets 7x6
G- 12x6 1/2 score at 4 & 8 fold into an accordian - 6 1/4 x 4 (this will slide into f pocket window)
H- 10x10
extra cardstock - 2x slider for d pockets 7 1/2 x 4
- 8x Waterfall 6x4 score at 1/2" for flap - 5 1/2 x 4
Acetate - 7 1/2 x 4 1/2 (for f pocket window)
Assembly order:
A - I - adhere H to B flap, stick down H - cut slit in E - add C & C1 flaps together & adhere to left back side of E - stick down E on too of B - Cut 1" window frame from F - adhere Acetate to back of F frame - adhere to under the slit on E (use foam tape to 3D window to make pocket) - slip in all the pocket sliders - open B to side to reveal H - on top of H add the Waterfall flaps.
Then enjoy & embrace your creative process by adding whatever embellishments you wish..
Photos below are definitely out of order, sorry! The best option is to watch the video for assembly and project share at the end once it's all put together..
Let me know what you think! Thanks for your time, Happy Scrapping..